You built a remote MCP server, or someone gave you a URL for one, and you want Claude to use it. You do not need to wait for a listing anywhere. Claude lets you add any remote MCP server by its address as a custom connector. It takes about two minutes.
This guide covers Claude on the web and in the desktop app, for personal plans (Free, Pro, Max) and for Team and Enterprise. I use the allclicks MCP server as the example, but the steps are the same for any server.
Before you start
You need three things:
A remote MCP server with an HTTPS address, usually ending in
/mcp, for examplehttps://mcp.example.com/mcp. Claude connects from Anthropic's cloud, not from your computer, solocalhostand servers inside a private network will not work. (For private servers Anthropic offers MCP tunnels, which is a separate setup.)To know how the server signs people in. Most servers that handle personal data use OAuth. Some use a fixed API key.
To trust the server. A custom connector is unverified: Claude can read data from it and, if it has write tools, change things through it. Only add servers you built or trust.
Step by step (Free, Pro, Max)
Open Customize → Connectors in Claude (claude.ai/customize/connectors).
Click Add, then Add custom connector.
Enter a name (anything you like) and the server URL, then click Continue.
Look at the authentication options. Claude reads the server's settings and marks what it found as Detected. Keep those unless the server's documentation says otherwise.
Click Add.
If the connector shows Connect, click it and sign in. For an OAuth server a sign-in window opens; approve the access.
On the Free plan you can add one custom connector.
Team and Enterprise
An Owner adds the connector for the whole organization: Organization settings → Connectors → Add → Custom (choose Web if asked). Then each member opens their own connectors page, finds the connector labeled custom and clicks Connect to sign in with their own account. Members without the right role cannot add one themselves; they ask an Owner.
Which authentication options to pick
The dialog asks how people connect:
Sign in now: each user signs in through the server's OAuth flow before using the connector. The normal choice for servers with personal data.
Sign in when needed: Claude connects without credentials and asks to sign in only when the server demands it.
No sign-in: anyone with the URL can use it. Use this only for public servers, or for a server that takes a key in a header.
If you picked OAuth, there is one more choice, OAuth client:
Use Claude's published identity: the recommended one. Claude identifies itself with a Client ID Metadata Document hosted by Anthropic, so you register nothing. The server has to support this method.
Register automatically: Claude registers itself through Dynamic Client Registration. Works with most servers.
Use your own OAuth client: you paste a client ID (and a secret only if the server requires one) that you registered yourself. When you register it, the redirect (callback) URL to allow is
https://claude.ai/api/mcp/auth_callback.
On a single-screen version of the dialog, the OAuth client and the request headers sit under Advanced instead.
If the server wants an API key instead, choose No sign-in and put the key under Request headers. This section is in beta and not shown to every organization, and custom header names have to be approved by Anthropic (the common ones such as authorization and x-api-key are in the list). Enter the value exactly as the server expects it, including the Bearer prefix if it needs one.
You cannot change authentication settings after adding the connector. To change them, remove it and add it again.
Use it in a chat
Open a chat, click +, find the connector in the list and switch it on for that conversation. Then just ask in plain words. Claude asks for approval before it calls a tool; click Always allow only for servers you trust.
To limit what a connector can do, open it in your connectors list and set individual tools to Blocked. This is the quickest way to keep a server read-only for yourself even if it offers write tools.
When it fails
It cannot connect at all. The URL must be public HTTPS and must answer MCP requests at that exact path. A URL ending in
/ssemakes Claude use the older SSE transport; change the transport under Advanced only if the server's docs say so.Sign-in loops or errors. Check that the server's OAuth metadata is public, that it supports PKCE, and that it accepts either Claude's published identity or Dynamic Client Registration. If you use your own client, the callback
https://claude.ai/api/mcp/auth_callbackmust be allowed.Tools did not appear or look old. Open the connector and refresh its tool list; Claude keeps what it read when you added it.
A server changed behind your back. Watch for tools that suddenly do something different. Remove the connector if in doubt.
Example: connecting allclicks
allclicks is a Search Console dashboard with an MCP server at https://app.allclicks.net/mcp. In Claude: Customize → Connectors → Add → Add custom connector, name it allclicks, paste that address, keep the detected OAuth settings, click Add, then Connect and sign in with Google. After that you can ask "Which of my sites lost the most clicks in the last 28 days?" and Claude pulls the numbers from all your properties. The full setup page is on allclicks.net.
Optional: list your server in Claude's directory
A custom connector stays private: only you or your organization can use it. If you want other people to find your server inside Claude, you can submit it to Anthropic's connector directory instead. There is one step that is easy to miss: approval does not publish the listing.
Submit the server through the directory submission form.
Wait for the review. For a community connector, the result comes by email from the Anthropic Directory team (mine said it was approved by an automated review of the listing).
Open the submission portal link from that email (it looks like
claude.ai/admin-settings/directory/submissions/your-server-name). The submission shows Approved with a Publish button, and the progress bar still reads Submitted, Approved, and only then Live.Click Publish when you are ready. The listing goes live at
claude.ai/directory/connectors/your-server-name.
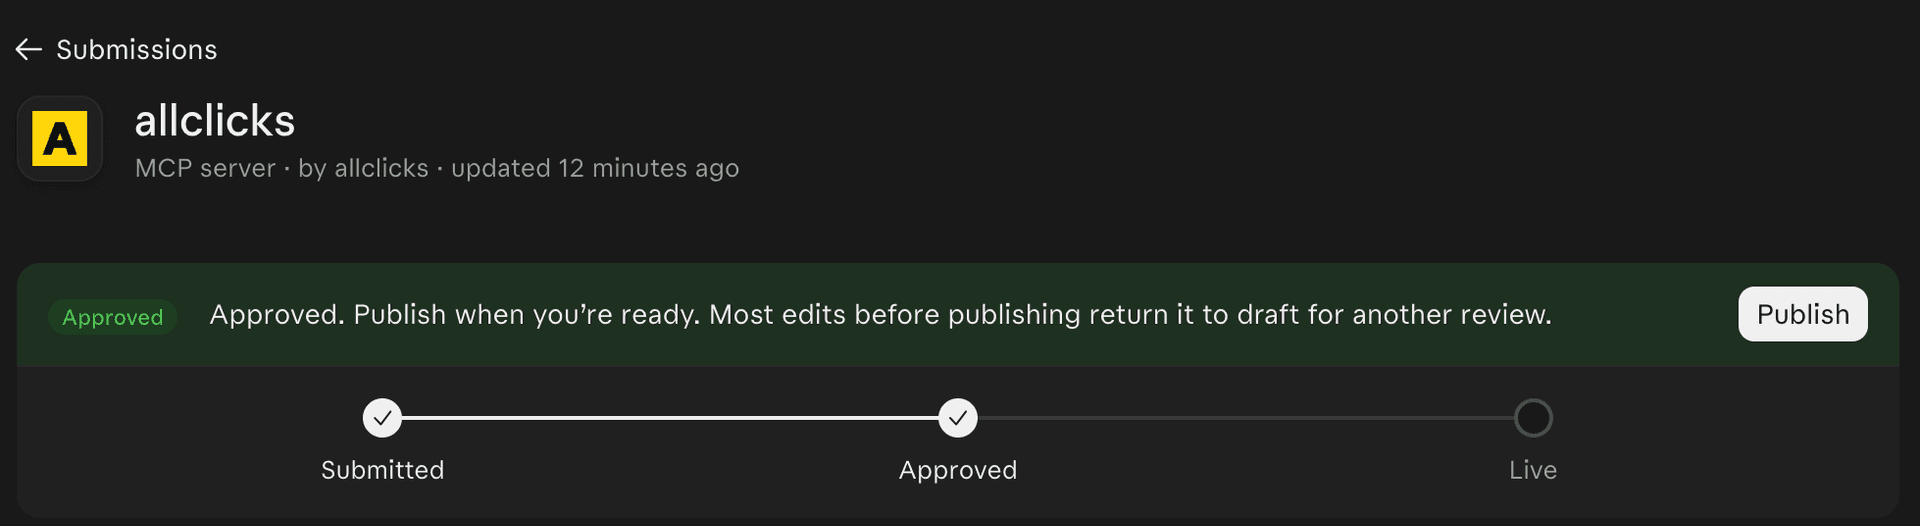
Two details from the portal: most edits you make before publishing send the submission back to draft for another review, so finish your changes first. And if you would rather not click it yourself, Anthropic can publish it for you; reply to the approval email. Community connectors and verified connectors are different levels; the verification page in Claude's docs explains the difference.
Claude Code and other apps
For Claude Code there is no dialog: run claude mcp add --transport http <name> <url>, then type /mcp and choose Authenticate. ChatGPT works differently; see how to add a custom MCP server to ChatGPT.